Showing posts with label Itty Bitty Shapes Punch. Show all posts

Tuesday, 18 September 2012

Shoe Box Swap - Tea Shoppe Dresser

This card from the Shoe Box Swap day was designed by Chris Chamberlain. I like this card, it's made to look like a dresser, using Crumb Cake cardstock and ink with the Woodgrain background stamp. The edges of each piece was inked with the Sponge Daubers, and the handles were punched with the small circle from the Itty Bitty Shapes Punch Pack. The tea cups and the label are from Tea Shoppe, and uses Not Quite Navy and Real Red ink. The plates were created with various sizes of the Circle Punches and the Regals Paper Stack.

This card could be adapted to look like a dresser or a wardrobe for a baby card, for example.


Monday, 17 September 2012

Shoe Box Swap - Bow Card

Today's card from the Shoe Box Swap class was designed by Ciara Jennings. It's a really simple, but effective card, and the bow looks so fancy. Ciara had provided a template that we used to cut around the Pool Party dotty paper from the In Colour paper stack. The Crumb Cake card blank was stamped in Crumb Cake ink with the Confetti background stamp, inside and on the outside of the card. The Rich Razzleberry card was punched with the Scallop Edge Border Punch, And a strip of So Saffron card stock was placed on top. The sentiment was from Teeny Tiny Wishes and cut out with the Word Window and the Modern Label punches. A flower was punched out using the Itty Bitty punch, with a Pearl in the middle. On the inside, a piece of So Saffron cut with the Top Note die using the Big Shot was added, for somewhere to write the greeting.


Wednesday, 29 August 2012

Crafternoon Tea Class - Tea Shoppe

Here's the last card from the Crafternoon Tea class I went to. It would have been daft for Kylie not to take advantage of the lovely stamp set from the Summer Mini Catalogue, called Tea Shoppe. This is the card she designed for us to make.

The colour combo is Marina Mist and Daffodil Delight, with Very Vanilla. Three tea cups were stamped and punched out with the 1-3/8" (3.5cm) Circle Punch. These were mounted into a strip of dotty papers from the Subtles paper stack, which was the placed onto a piece of Daffodil Delight card stock, which had been edge punched with the Scallop Border Punch. The Just For You sentiment was punched using the Word Window Punch, then mounted onto Daffodil Delight punched with the Modern Label Punch. Flowers punched from the Itty Bitty Punch set were placed onto the cups. Lovely and simple!

Tuesday, 14 August 2012

Craft Decathlon - Diorama card

Last month I attended a fun class run by my Stampin' Up! upline Julie Kettlewell. Even though I'm a demonstrator and run my own classes, it's still good fun to go to other classes, for ideas and to meet other crafty people. The decathlon was a full day of 10 different projects (some of which I've not finished yet-oops)

The first I'm sharing is a diorama card, and it's so effective and a little different to a normal card. The Simply Scored board was used to score the folds in the Island Indigo card stock, and the Labels Collection framelit dies were used to create a window and the panel for the back of the card. The stamp set used in this card was Bordering On Romance, with sentiments from For My Family and Petite Pairs. The In Colour inks were used with the blender pen to colour the flowers and leaves. Finally, a couple of flowers were punched from the Itty Bitty Punch, and a couple of sprinkles of Dazzling Diamonds to give the card a bit of sparkle.


Monday, 11 June 2012

Stamp-a-stack 1 - Wedding Card

Here's the first of my last set of Stamp-a-stack cards. This one uses the Love and Laughter set from the Summer Mini Catalogue, and has the colour combo of Very Vanilla and Crumb Cake. The Very Vanilla has been embossed with the Vintage Wallpaper embossing folder, and the cake image has been stamped with Crumb Cake ink. A couple of flowers were punched using the Itty Bitty Shapes punch, and finished with pearls in the middle. I made two of these cards, one for an engagement, and one for a wedding, which I have sent to a friend of mine who got married last week. I hope she liked it.


Papers / Card Stock - Very Vanilla, Crumb Cake, Mocha Morning DSP
Stamp Set - Love and Laughter
Embellishments - Satin Ribbon, Rhinestone Pearls
Tools - Big Shot, Vintage Wallpaper Embossing Folder
Inks / Markers -  Crumb Cake
 

Friday, 18 May 2012

Little Princess Stamp-a-stack card

I attended a Stamp-a-stack class a few weeks ago, and only getting round to posting these now.  I've got another one in a weeks time, I'll have only just finished posting the last lot and I'll have six more to write up!
 
This card uses the Little Princess stamp set, and the colours are Peach Parfait, and Pretty in Pink.  The princess was stamped with Basic Gray onto Whisper White card stock, and her hair was coloured with a So Saffron marker.  The Decorative Label punch was used to cut her out, and then used to make an extended border around her in the Peach Parfait card stock.  The new Adorning Accents Textured Impressions Embossing Folders were used to make the hearts embossed panel at the bottom of the card.  These are thin embossing folders, which can be positioned anywhere on the card.  The Large Oval Punch was used to punch out the Princess sentiment, and then mounted onto the Scallop Oval Punch for a border.  The Itty Bitty Shapes Flower Punch was used to punch out the flowers on the sentiment.  I like this card and stamp set, perfect for all the little princesses in your life!


Papers / Card Stock - Peach Parfait, Pretty in Pink, Whisper White, 2010-20112 In Colour Patterns Designer Series Paper Stack,
Stamp Sets - Little Princess
Embellishments - Rhinestone Jewels, Pretty in Pink Scallop Dots Ribbon
Tools - Big Shot, Adorning Accents Textured Impressions Embossing Folders, Decorative Label Punch, Itty Bitty Shapes Punch, Scallop Oval Punch, Large Oval Punch
Inks / Markers - Basic Gray, Pretty in Pink, So Saffron, Peach Parfait

Friday, 20 April 2012

Beautiful Bows Card 5

Morning,

At last, here's the fifth and final card from the Beautiful Bows class.  A nice simple card, with a really easy bow.  There was no tying involved for this bow, simply a bit of folding of the ribbon, and a carefully placed Antique Brad to hold it in place.  Clever eh? The Large Scallop Circle was used to punch out one of the stamps from the Everything Eleanor set, don't forget this punch is only available until the end of this month, with the end of the Spring Mini Catalogue.  The swirly stamp was stamped in Lucky Limeade onto Crumb Cake card stock and then embossed with the Vintage Wallpaper embossing folder in the Big Shot.  It's always a good idea to do your stamping first, else it can be difficult to stamp after the card has been embossed.

I hope you've enjoyed these Beautiful Bows cards, and if you'd like to learn any of the techniques, I'd be happy to demonstrate them.  Contact me to book a workshop, or enquire about attending a class.


Paper / card Stock - Pool Party, Crumb Cake, Very Vanilla
Stamp Sets - Petite Pairs, Everything Eleanor
Embellishments - Satin Ribbon, Antique Brads, Rhinestone Pearls
Tools - Big Shot, Vintage Wallpaper Embossing Folder, Itty Bitty Shapes Punch
Inks / Markers - Basic Gray, Lucky Limeade

Tuesday, 10 April 2012

Beautiful Bows Card 2

Well it's all back to normal now after the long weekend, shame the weather wasn't like it was last weekend, but at least I wasn't tempted to sit outside, and instead I got some planning and organising done for my next two card classes.  I also realised at the weekend that as well as having two card classes in a week, I have an all day team training event with swaps to make, and another stamp-a-stack class to attend.  I'll be crafted out by the end of all of that! I'll have plenty of blog material to share with you at least, if I ever catch up with it all.

Here's the second card from the Beautiful Bows class.  This one features a double looped bow, and was the most scary looking one out of all the bows we made, I was sure I wasn't going to be able to make this one.  Luckily, it wasn't as hard as it looked, and ended up looking pretty good.


Paper / card Stock - Pool Party, Very Vanilla, Lucky Limeade, Everyday Enchantment (Sale-a-bration papers)
Stamp Sets - Everything Eleanor, Petite Pairs
Embellishments - Satin Ribbon, Rhinestone Pearls
Tools - Scallop Edge Border Punch, Itty Bitty Shapes Punch
Inks / Markers - Crumb Cake, Lucky Limeade, Pool Party

Sunday, 1 April 2012

Creatively Yours Set

This is another project that I was kept busy with at Kylie's when we had our craftathon weekend! I'd seen this on Pinterest, and thought I'd give it a go. The 2011-2013 In Colours were used, stamped onto Whisper White card stock.

The "Handmade" banner stamp was cut around and placed onto a flag cut in the same colour card stock, and stuck onto a cocktail stick.

The "Made with my own two hands" stamp was stamped and punch with the 1 3/4" Circle Punch and the Scallop Circle Punch.

There was a bit of cutting out to do for the "Made just for you" stamp, and I added a flower punched with the Itty Bitty Bits punch, and added a Rhinestone Jewel in the centre.


The "Handstamped" stamp was just cut around.


The "Deliciously made for you" stamp was punched with the Large Oval Punch and the Scallop Oval Punch, as was the "From the kitchen of"


The "Created By" stamp was punched with the Decorative Label Punch, and ink applied around the edge with the Sponge Daubers.


Here they all are together as a set.  These would look great attached to home made produce or gifts, or just used as sentiments on the back of a card.  For any of you crafters out there that sell your crafts, Stampin' Up! operate under the angel policy, which means you can sell products you have made with Stampin' Up! images, as long as it displays one of the (c) Stampin' Up! images on it to protect their copyright.  


Thursday, 1 March 2012

Celebrate Sale-a-bration

Afternoon all,


I hope you are all well this lovely sunny spring afternoon.  I've just found the first daffodil in my garden, so that's pleased me.  I've got a Stampin' Up! workshop this evening, I'm really looking forward to it.  Hopefully, everything is packed ready to go, and so far, I've not forgotten anything.  I've got a few crafty things I've been working on that I'll be putting out on display this evening, I can't wait to show you on here what they are. 


On Tuesday, I attended a team training event run by Julie Kettlewell and other members of her team.  There were a few new faces around the table, so it was nice to meet them, as well as hear stories of how well other demonstrators are doing.  It's great to know how they run their workshops and classes, and knowing that they love Stampin' Up! as much as I do is a relief that I'm not the only one obsessed!
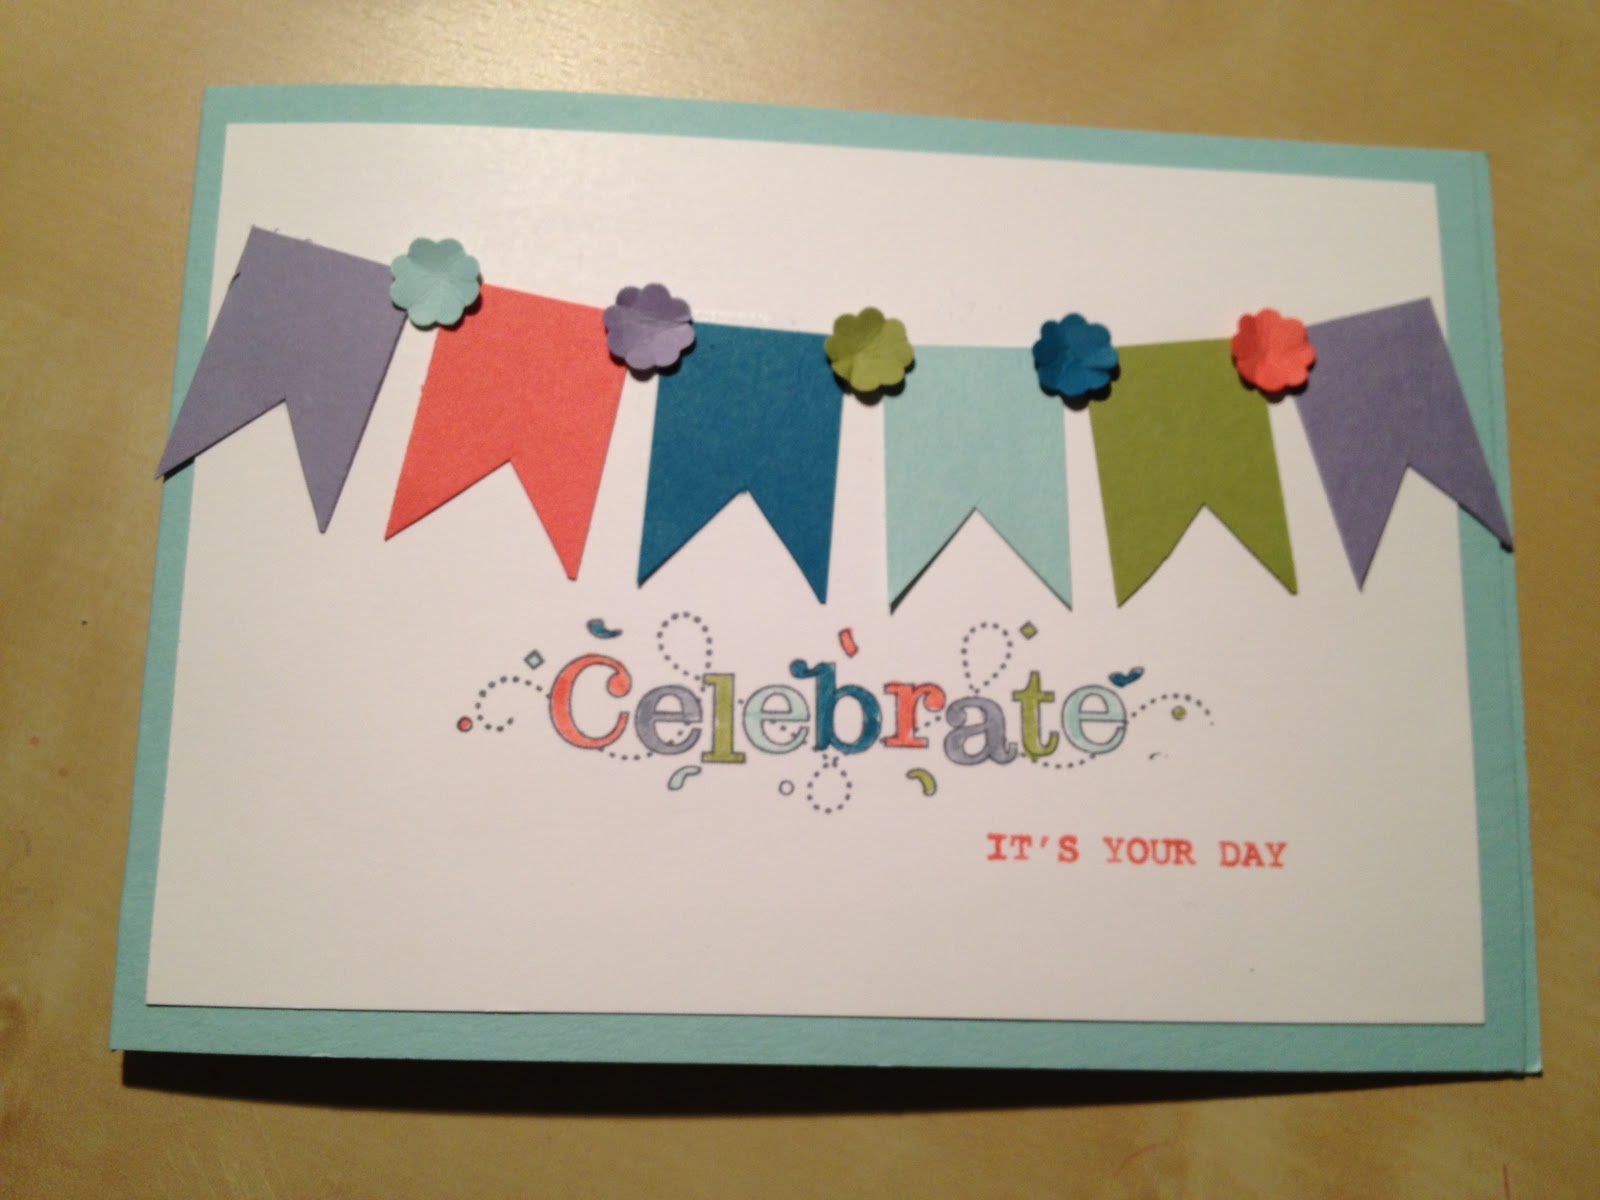
As well as the business training side of the get together, we also get hands on and do a bit of crafting.  As we've still got a month of Sale-a-bration left, we used the Outlined Occasions stamp set.  Julie loves the bunting cards as much as I do, so we made another bunting themed card.  We focused on the 2011-2013 In Colours, and just used the markers for these two cards.


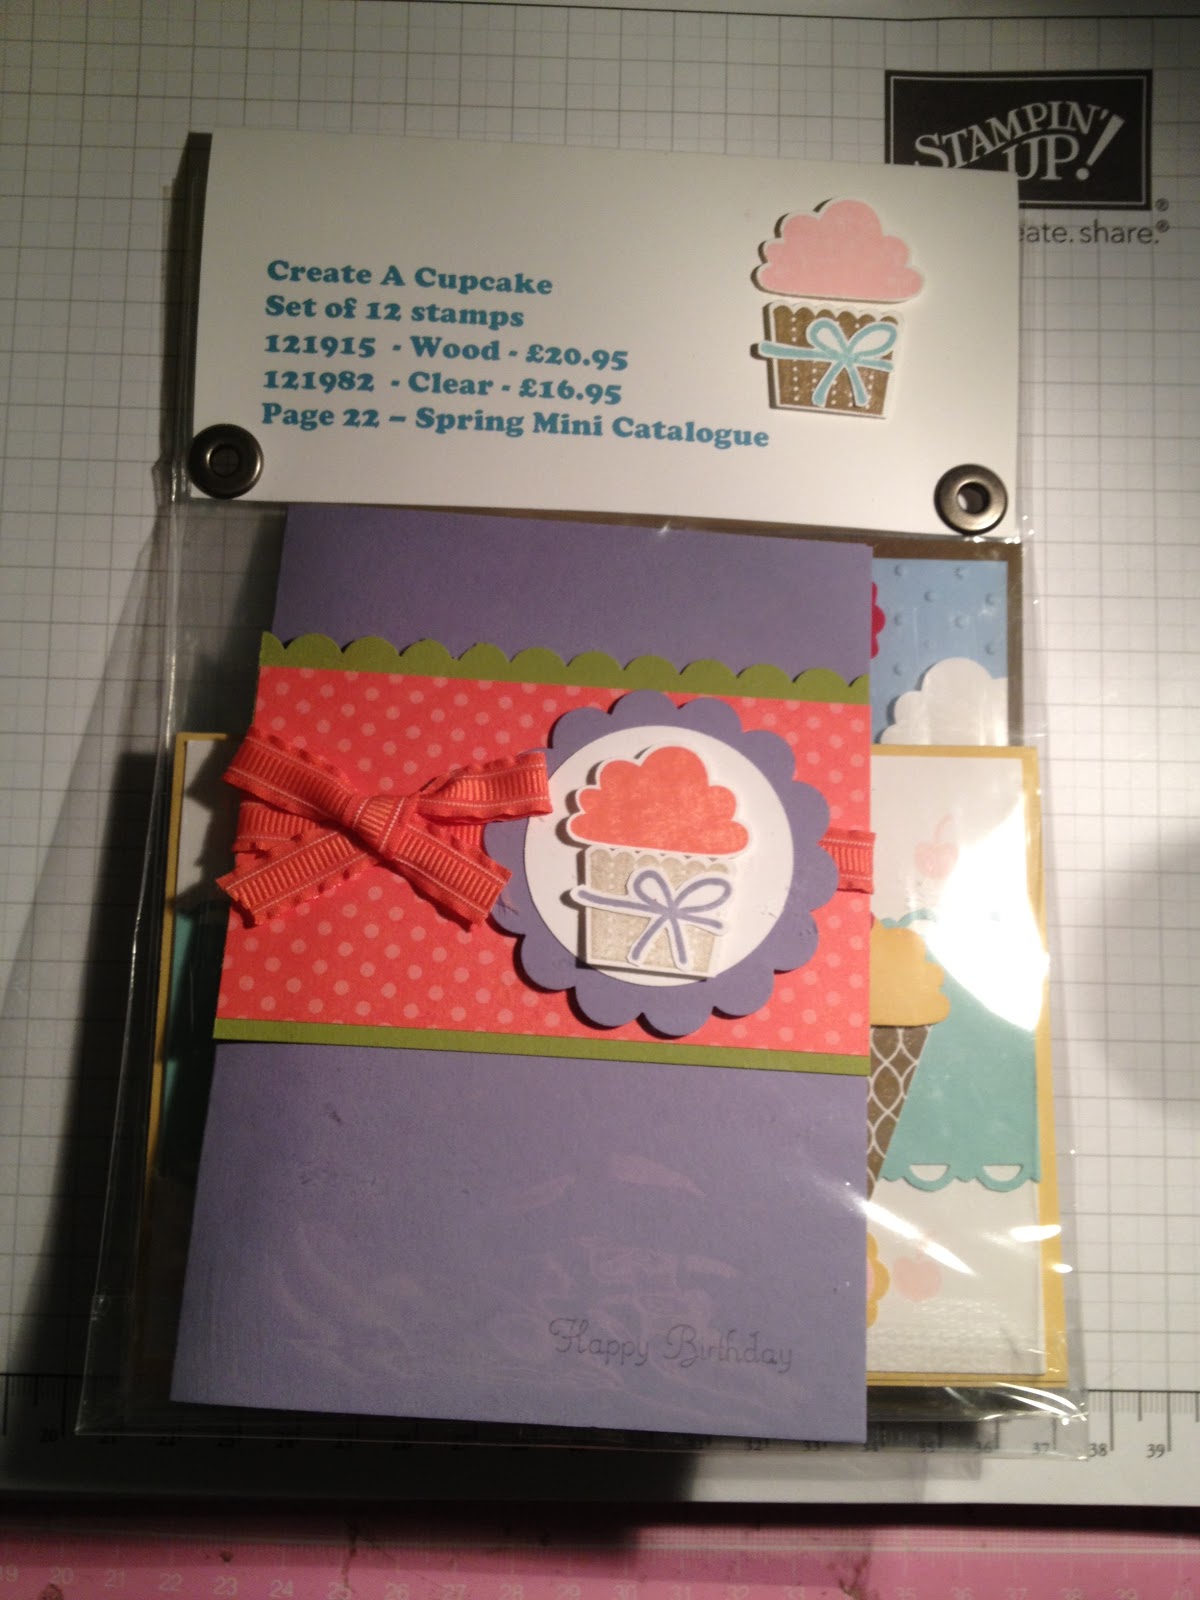
We made a fancier version of the card, using the Everyday Enchantment papers, and added extra bling with the Rhinestone Jewels and ribbon.


I love these cards.  It's amazing the difference a few extra products can make to a card, to add that extra wow factor.  If you fancy having a go at making these cards, you can get your hands on all the products you need for just £46.25 for the first card.  That includes a pack of the In Colour card, the In Colour markers, a pack of Whisper White card stock, The Itty Bitty punches, a Basic Gray ink pad, and you'd get the Outlined Occasions stamp set for free.  For the second card, for another £45.20, you'd receive the Word Window punch, the Large Oval Punch, a pack of the ruffled ribbon, a pack of Rhinestone jewels and the linen thread, and you'd also get the Everyday Enchantment papers for free.  If you are interested in making these cards, please let me know.  If you've already got some of the items, you can always swap and change to another product.

We also made a gift bag at the training session.  It's a style I've never seen before, and I was impressed at how simple it was to make.


Don't forget, these papers and stamps are only available until the end of March, so get in touch if you'd like to get your hands on them. 


Tuesday, 14 February 2012

Last card from the training day

Here's the last card I have to share with you from the All Day Training.  It uses the Create a Cupcake stamp set and punch to make a little carton, for popcorn made using the Itty Bitty Shapes punch.  One thing I didn't mention earlier, is that when we were making these cards at the training day, the six of us on the table worked together and each took a bit of the card so we got them done quickly.  For this one, myself & Kate punched and inked the edges of 20 popcorn each, for 6! I think I dreamt of popcorn that night.


Paper / Card - Daffodil Delight, Real Red, Whisper White, Basic Black
Stamp Sets - Create a Cupcake, Sincere Salutations,
Embellishments -
Tools - Large Oval Punch, Itty Bitty Shapes Punch, Cupcake punch, 1-3/8" (3.5cm) Square punch
Inks / Markers - So Saffron, Basic Black, Real Red


This is the Baggie Book that we created with all five cards.  It's a great way to show lots of cards using the same stamp set, and can easily be passed round at a class or a workshop and the cello bags keep the cards clean and protected.  I'd like to make these for all my stamp sets, one day I'll get round to it!


Wednesday, 11 January 2012

Team Training

A few weeks ago, I attended a team training session at Julie Kettlewell's house.  We got to see a few sneak previews of items from the Mini Catalogue that had arrived already on the pre-orders, and this is the card and gift we made, using the My Friend set.  That's one of the benefits of being a hostess, we get to see and order the products to play with before they are released in the catalogues.

Both the cards and the gift bag used the colour combination of Lucky Limeade and Concord Crush. The butterflies were cut with the Beautiful Wings Embosslits Die.  The little flowers were punched with the Itty Bitty Shapes Punch.  We made two cards, same design, but with one showing what a difference a few extras make to it, by adding the rhinestones jewels and the Scallop Dots Ribbon, it does make it look that bit more special I think.

The gift bag was made with two Scallop Circles using the Bigz die, and contains a cello bag inside which could be used for sweets or other small gifts.


Card Stock - Lucky Limeade, Concord Crush, Whisper White
Papers -
Stamp Set - My Friend
Embellishments - Rhinestone Brads, Scallop Dot Ribbon, Ruffled Ribbon
Tools - Big Shot, Crop-A-Dile, Decorative Label Punch, Itty Bitty Shapes Punch
Inks/Markers - Lucky Limeade, Concord Crush