Thursday, 21 November 2013

Convention Team Swaps


Evening all!

Remember me? I used to write this blog! Life has been a bit busy recently, and I've not had much time to keep in touch on here.  I'm due to start a new job soon too, so that will take a bit of getting used to after working where I currently work for the last ten years. It's all exciting stuff though, I'll let you know how I'm getting on.

This evening, I'm in Manchester for the 2013 European Stampin' Up! Convention, and it's my first one ever! I've been a demo for about two and a half years now and I've not managed to go to convention yet.  I was a couple of places short of booking on last year, and left it too late and it was full.  Living in Leeds, I had no excuse not to be the first in the queue this year as it's just a train ride away. I can't wait to share some pictures with you, and tell you all about what I get up to.

There was a few things we had to make to bring with us.  Team swaps, general swaps and a gift for our room mate if we're sharing a room.  I'm sharing with my friend and downline Kylie.  Today I'll be sharing pictures of the team swaps I made.

It's always tricky deciding what the perfect swap will be, and it took me ages to decide what to do.  I decided to make candles, with a Christmas image from My Digital Studio (MDS).  This seemed like a great idea, and I made the first one.  It looked great.  Off I went to Ikea, to buy enough for the 32 ladies who have opted in to the team swaps.   I realised then, that my idea may not have been such a good one after all!  I bought the 32 I needed, as well as a few extra, and by the time I had lifted all 50 candles on to the till, I was bright red and wondered what all the people in the queue behind me thought I was doing with all these candles! The man right behind me congratulated me on my dedication to lifting them all.  Then I realised I had to transport them all to Manchester! Oh well, it was too late to change my mind.

I printed the image from MDS onto normal printer paper, to make sure I had the size right.  After a few adjustments, I was happy with my image, and I then printed the image onto tissue paper which had been taped onto a piece of card with masking tape.  I then cut out the image and used a tiny bit of glue on each corner to stick it lightly to the candle.


 I then wrapped a piece of tissue paper around the candle and gently heated the image using a heat gun.  The heat melts the candle just enough to melt the tissue paper into the wax giving a smooth finish.


 I love this technique and it can be done with any stamped image or printed image. I then wrapped the candle in cellophane and tied a small length of Linen Thread to secure the cellophane then tied a length of the lovely Cherry Cobbler 1" (2.5cm) Stitched Edge Grosgrain Ribbon around into a bow. 


I really hope my team like their gifts, and I can't wait to see what lovely things they have made.  It's been fun seeing everyone's updates on our Facebook page, seeing the hours they have spent crafting away, and the excitement building!

Here's a picture of the swaps altogether...see why I realised how heavy they were going to be! The next picture of the candles in the box is just over half of the full lot! My suitcase was very heavy, and one of the wheels broke as I got off the bus in Manchester, and had to drag it down the street to the hotel.  Thankfully I don't have to take them back with me to Leeds!


Friday, 4 October 2013

My Digital Studio Library App


Have you downloaded My Digital Studio yet?  I hope you have, because it's so exciting, there's so much content on there for all your digital crafting.  Now there's an easy way to keep track of what you have purchased, with the new My Library for My Digital Studio app.  At the moment, it's only available for iPads, but they are hoping to release the software for iPhones and Android phones very soon.  You can easily see what is new each week, as new content is added all the time.  You can also add items you own to your collection, you can set up wish lists (mine will be huge!!), you can sort your lists to easily find your downloads, search for new downloads, and can link to the online Stampin' Up! store to make purchases.  What more could you want!  Now I just have to hope Santa brings me something shiny in my Christmas stocking this year (hint hint, nudge nudge if Santa is a follower of my blog!)

If you haven't yet downloaded the software, you can get a free 30 day trial by clicking this link here, and if you simply can't wait and want the full version (it contains loads more content) click here, it costs only £13.95.  

Wednesday, 2 October 2013

Book your party now - extra £25 of hostess benefits during October!


You may be aware that this year is Stampin' Up!'s 25 anniversary. As a result, they are offering loads of promotions and special offers. The latest offer is too good to miss. If you host a workshop with sales reaching £250, you'll get an extra £25 worth of hostess benefits! That's £65 instead of £40! Contact me now to book your workshop during October.

Best Of...Sale-A-Bration


Morning

Here's the latest Best Of 25 Years stamp sets, and this time it's the best of Sale-a-bration.  There's 5 stamps in the set, 4 from previous sale-a-bration sets so you may recognise a few of them.  The set costs £13.95 and comes in clear mount only.  The set is available until the 31st March 2014, or until stocks last.

Wednesday, 25 September 2013

All that glitters!

Morning!

I went to a 40th birthday party last Saturday, it was fancy dress in the style of 80s glam, Studio 54 and New Romantic. After much browsing, I ended up with a costume that was designed to be a buccaneer which I thought looked a bit Adam Ant. 

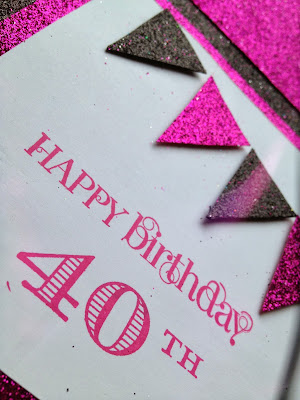
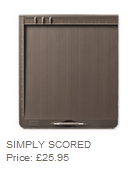
I wanted to do a fancy card for the occasion, and what better design than the Wow card that I've made for a few special occasions. I knew the party was going to be glitzy, and I wanted the card to match. Off I went to my local craft shop, and found the perfect papers.  I used a sheet of 12" x 12" Basic Black card stock, and using the Simply Scored Board I scored the lines to make the folds in the card.  I cut out various triangles of the glitter paper, and stuck them onto the front of the card.  


I used the Curly Cute stamp set for the Happy Birthday sentiment, and the numbers are from the Memorable Moments stamp set, stamped with Melon Mambo ink.  I used the Petite Pennants Builder Punch to make the bunting across the top of the card.


Here's the card all tied up with the band around the middle. The Large Oval Punch was used to punch out the numbers, and the Decorative Label Punch was used for the label.


Items Used

All the items (except the glitter paper) can be bought from my online shop.  Click on the links below.


Tuesday, 24 September 2013

Clearance Rack


The Stampin' Up! Clearance Rack is here!  There's some great discounts, up to 80% on papers, card stock, embellishments, fabric, dies and lots more.  You can buy these items from my online shop - just follow the link here.  

Thursday, 19 September 2013

Craft Sale


For any of you out there that live in Leeds, I'm taking part in a craft and table top sale in Roundhay, Leeds on Saturday.  I'm selling off loads of my old craft stash, including lots of Stampin' up! retired stamp sets.  There's some real bargains to be had, and most of the stamp sets are 50% cheaper than their original price.  Please come along and say hello!

Wednesday, 18 September 2013

Gingham Garden Mini Milk Cartons


This is a long overdue post that I've had saved in my drafts folder for too long!  There's a few of them saved in there, and I need to decide whether to finish writing them or just delete them.  I'll have to have a big catch up sometime soon.  

These pictures show the swaps I made for the last team training event that I attended.  I'd got the Gingham Garden Designer Series Paper and the Washi tape as a pre order before the Annual Catalogue was released, so I decided to use those.  I'd seen lots of pictures online of clothes pegs with washi tape on them, so off I went to the shops to find some plain wooden clothes pegs.


The picture below shows the clothes pegs covered with the washi tape.  The flowery patterned one was the perfect size for the pegs.  I placed a peg in each one of the mini milk cartons, which can be seen on the next photo.


Here's the mini milk carton I made, decorated with rectangles of the Gingham Garden DSP.  I also used the Label Love and the Artisan Label punch to create a label for the carton.  I stamped onto Whisper White card stock with various colours of ink, and then covered the wet ink with the clear Stampin' Emboss Powder which I set with the heat tool.


This picture shows a close up of the top of the mini milk carton, with the washi tape holding it closed.  There's loads of things that washi tape can be used for, I've still got to try out some more uses for it.


This last picture shows all the cartons in the box ready to go to be swapped.  I got some lovely swaps that day, and loads of new ideas.  


Items Used


Tuesday, 17 September 2013

New Single Stamps


This is the second set of single stamps released by Stampin' Up! There are eight different stamps to choose from, six of which co-ordinate with Framelit dies or punches. They are available until the 31st January 2014, and they come in clear mount. Which one do you like best?


Friday, 6 September 2013

Butterfly Bundle Offer


Between the 29th August to the 30th September 2013, you can get 15% off this bundle, which contains the Papillion Potpourri stamp set and the Bitty Butterfly Punch. The wood mount set costs £26.52 (normally £31.20) and the clear mount set costs just £23.97 (normally £28.20). Contact me now to place your order.


Thursday, 5 September 2013

2013-2014 Autumn Winter Catalogue now available

The 2013-2014 Autumn Winter Catalogue is available to browse and purchase from. There's loads of new, gorgeous products covering Halloween, Christmas, and loads more. Take a look here to view the catalogue online, or contact me and I'd be happy to send you one in the post. Don't forget you can now buy online from me so you don't even have to leave the sofa!


Wednesday, 4 September 2013

My Digitial Studio is now available

I have more news for you! I can barely contain my excitement, so I don't know how you can! You can now download My Digital Studio, and what's better, you can download a 30 day trial for free! Just go to my store, and use the product code 130910. You can create all sorts of projects, including cards, postcards, journals, photobooks, posters, calendars and so much more. The software comes with loads of samples, and the full product is just £13.95 and contains loads more. There's new downloads available all the time so it will never get dull.

I've included a link to a video - take a look to see what all the fuss is about.

Buy Stampin' Up! products online!

I'm very excited to announce that you can now purchase Stampin' Up! products from me online! You don't have to wait to see me to place an order, and you can browse and shop at your leisure. I'm very excited about this, and I hope you will be too (your purses might not thank me though....!)


Click here to visit my page and you can find my shop here

If you have any questions, please do not hesitate to get in touch.
Happy shopping...who will be my first customer???

Tuesday, 3 September 2013

Best of 25 Years - Christmas


Here's the latest Best of...25 Years stamp set, and it's Christmas themed! Get it early and get started on those Christmas cards, you'll thank me in December when they're all made and posted.  The set contains five stamps, and costs just £13.95.  The set is available to purchase until 31st March 2014, or until stocks last.

Tuesday, 20 August 2013

Wedding Acceptance card

I can't believe it's nearly a month since I've blogged! I must get back into the habit of sharing my creations again, life has just taken over recently and I've not had much spare time! I've done a little bit of crafting, but not nearly as much as I'd like, and have bought some new products which are crying out at me to play with them. I have spent some time tidying my craft room (again!) and had another clear out of stuff that I know I am not going to use. I used to buy a lot of non-Stampin' Up! items before I became a demonstrator and didn't know what to do with them.  That's one thing that I love about Stampin' Up, all the ideas and examples that people make and share.

I recently made a wedding card for my colleague (see the post here) and he was so pleased with it, he asked if I could make a wedding card for his step daughter, and also a wedding invitation acceptance card.  I always try to accommodate any requests that people might have, and on this occasion I was asked to make the card inline with the theme of their invitations, which included a thistle and a white rose.  I had seen an old Stampin' Up! set called Natures Pace, but couldn't get hold of it.  Instead, I decided to find some clip art and after much searching I found suitable images.  


The card was made in the style of a tri fold card, and I used retired papers called Springtime Vintage.  As I said before, I've had a good sort through my stuff, and have separated all the retired products, papers and colours, and it's such a shame to see the papers sitting there not used yet.  The card blank was made from Not Quite Navy.  


I used My Digital Studio, an digital designing product to make the personalised centre for the card.  I'm still learning how to use it, but I'm really enjoying it so far and can't wait to see what else I can create with it.


I've still got to make the wedding card, I'm going to use the same papers and colours, and I'll be making something special that I hope they will treasure forever.


Thursday, 18 July 2013

Peekaboo Owl card

This is a card I made at a class where we were making cards for men and boys.  It's a really cute card, using the Owl Punch with a window created with a Circle Punch and a frame made with the Scallop Circle Punch.  The card blank is Rich Razzleberry, and the wood grain effect paper is from Natural Composition.  The sentiment from Teeny Tiny Sentiments has been stamped with Rich Razzleberry onto Whisper White card stock and punched with the Word Window Punch, then mounted onto a piece of Rich Razzleberry card stock punched with the Modern Label Punch.

Here's a close up of the owl behing the frame window.  I love how the eyes can be placed in differnt positions to create a different expression on each owl.

You can see in this picture that the owl has been placed on the inside of the card, with a little branch for it to stand on, which has been punched from the Bird Punch.