Monday 28 May 2012

Jubilee Card Class - Union Jack

Here's the final post about my Jubilee cards from my last class. This one features a Union Jack, and there was no stamping involved with this one.  There was lots of cutting and trimming for me to do beforehand, but a nice easy sticking and gluing card in the class.  I used the Regals paper stack for the Riding Hood Red and Not Quite Navy papers, with Whisper White strips that were embossed with the Square Lattice embossing folder. 


Sunday 27 May 2012

Jubilee Card Class - Celebrate

Here's another detailed post about one of the cards I made at the Dock Street Market class.  The colour combo is again Riding Hood Red and Not Quite Navy with Very Vanilla.  I used the Party This way stamp set for the balloons, with the Outlined Occasions Sale-a-bration set for the sentiment, which was coloured in with the blender pen.  Satin ribbon was used for the bow, I think I'm getting quite good at these now after attending the Beautiful Bows class a while ago.  I'll have to start making some of the other ones we learnt, if i can still remember how to do them.  i used the Linen Thread to make strings for the balloons, which was attached using the Sticky Dots.


Saturday 26 May 2012

Teapots and Twirls

Morning everyone,

Hope you are enjoying the sunshine so far this week. I've not made it out of bed yet today, but I can tell its another lovely day. I think Hugo (my kitten) can tell it is too, he's miaowing from the attic tells me he wants me to get up, it does get warm up there! He's been out in the garden this week, eating grass and discovering new things. I live on a fairly busy road, and it's a gradual process letting him explore incase he gets a bit keen and runs into the road.

Enough about kitties, back to crafting. I'm attending an event today in Armley in Leeds, called Teapots and Twirls. I don't know much about the event, apart from it involves dancing, tea and cake. Sounds a fun way to spend a Saturday afternoon. I saw on Twitter that they were looking for crafty people to sell things, so I jumped at the opportunity, and offered to bring my Jubilee cards for people to make, with a range of cards to sell too. Hopefully it will go well, there will be plenty of people to chat to and share Stampin' Up! with.

I'll drop by later to let you know how it went. Have a nice day whatever you're up to.

Alex

Jubilee Card Class - Crowns

I held a Jubilee themed card class at Dock Street Market on Tuesday, and here's one of the cards we made.  The colour combo is Riding Hood Red, Not Quite Navy and Crumb Cake.  The card has a fold in the middle of the card, I fancied making something a bit different to the standard shaped cards.  I used Artistic Etchings, and stamped the Crumb Cake with the crown stamp, and also with the small crown from Elementary Elegance, a Sale-a-bration stamp set.  The Perfect Pennants die was used to cut out the Not Quite Navy scalloped circle, and the 1-3/4" Circle punch was used the punch out the Riding Hood Red. Another crown was stamped and cut around, and had Rhinestone Jewels added for an extra bit of bling.  The edges of the Crumb cake and the circles were sponged with Crumb Cake ink and the Sponge Daubers to add a vintage feel to the card.


Friday 25 May 2012

Stamp-a-stack cards - Retired products

Hello,

I was going to stretch this post out into three posts, but changed my mind, as I have so many things to post at the moment, so I'll do three cards in this one.  The last Stamp-a-stack class I attended was just before the end of the Spring Mini Catalogue, so three of the cards featured products that were due to retire shortly.  They are no longer available, but luckily we've now got the Summer Mini Catalogue to get excited about.

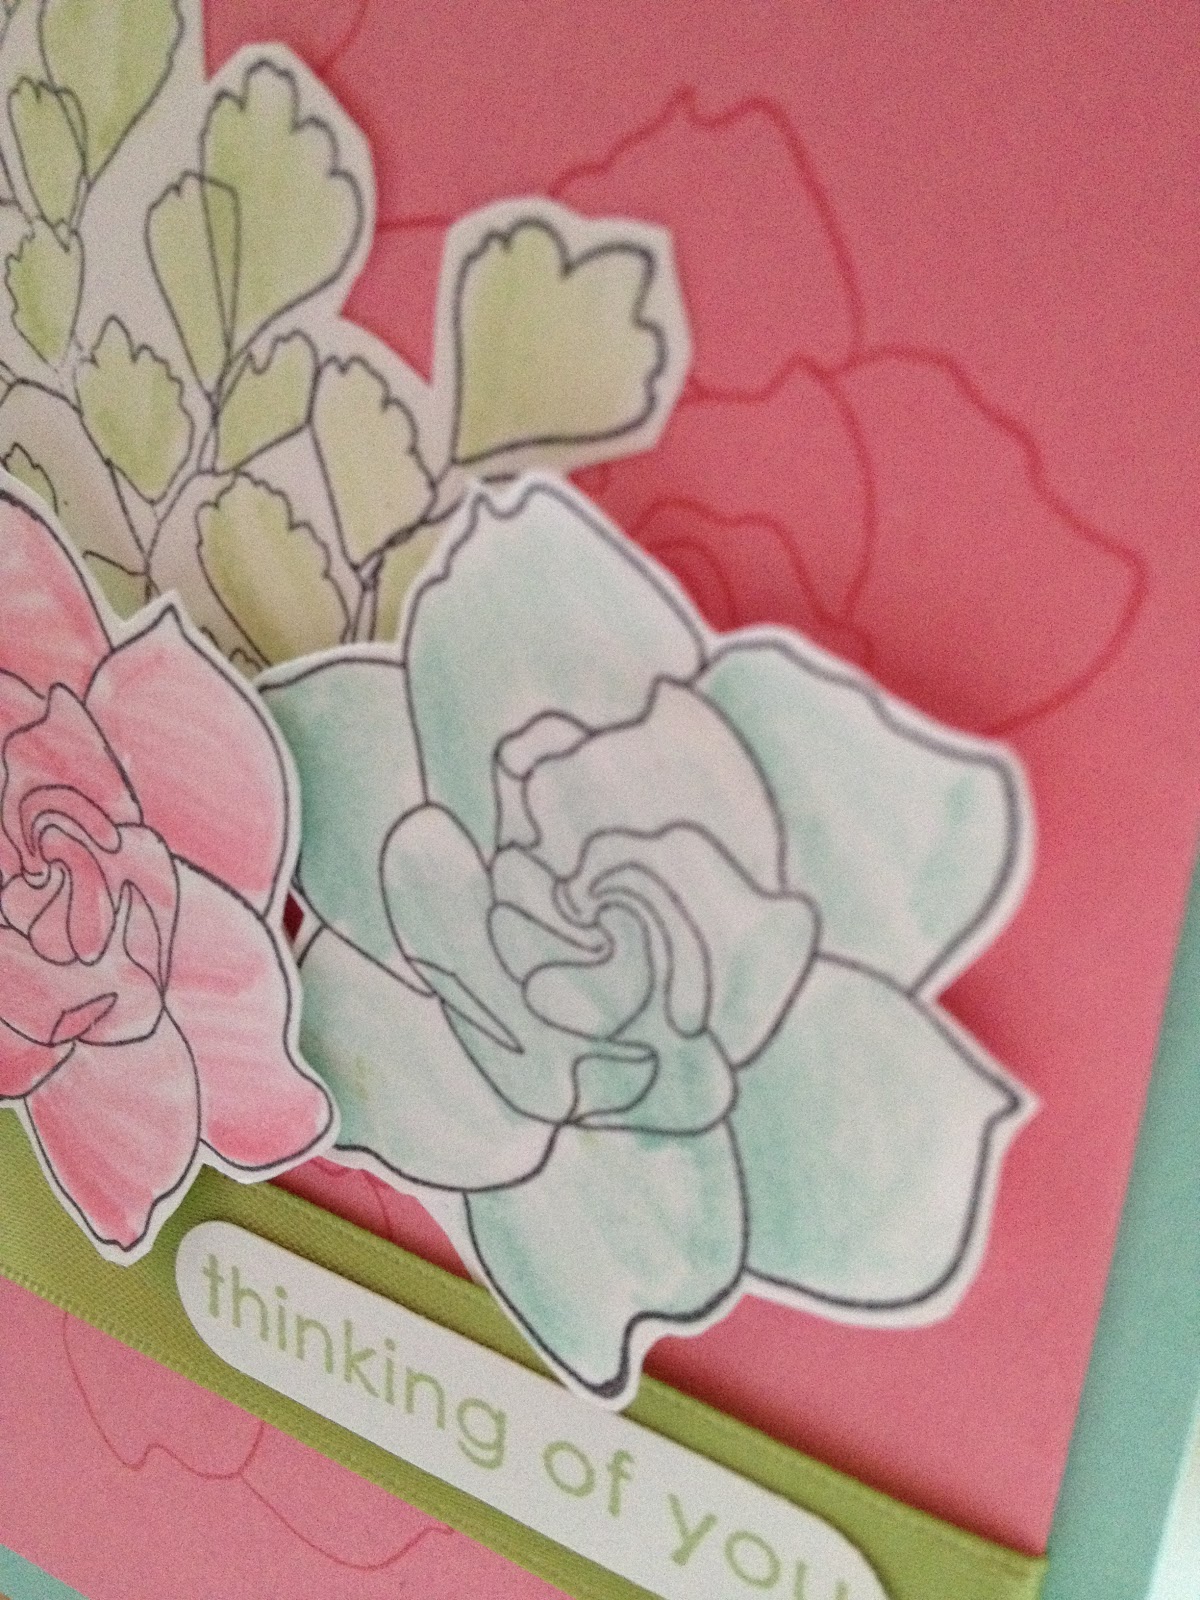
The first card features the papers Berry Blossoms.  These were nice bold papers, and I like the layout and design of this card.  Various strips of paper were cut into strips, and cut into the flag shapes.  The sentiment is from Curly Cute, and the ribbon is the Lucky Limeade Ruffled Ribbon. Flowers were stamped onto the Wisteria Wonder card stock from the Fruit & Flowers stamp set, also from the Spring Mini Catalogue. 


I'll be using this layout again, it could be done with any of Stampin' Up!'s Designer Paper Series.

Papers / Card Stock - Wisteria Wonder, Calypso Coral, Whisper White, Berry Blossoms
Stamp Sets - Curly Cute
Embellishments - Lucky Limeade Ruffled Ribbon
Tools - Paper Cutter
Inks / Markers - Lucky Limeade, Wisteria Wonder


The second card uses papers from Spice Cake, with the colour combo of Crumb Cake, More Mustard and Pool Party.  The Postage Stamp punch was used to cut out the squares of papers, and the new Simpy Scored tool was used to made the Flower which is made from two pieces cut with the Large Scallop Circle Punch. The sentiment is from Happiest Birthday Wishes, one of the hostess sets.


Papers / Card Stock - Crumb Cake, Pool Party, Spice Cake Designer Series Paper
Stamp Set - Happiest Birthday Wishes (Hostess set)
Embellishments - Scallop Dots Ribbon, Antique Brad
Tools - Simply Scored, Large Scallop Circle Punch
Inks / Markers - Early Espresso

The third card features the stamp set Borderlines.  I must admit to having this set, and not using it very much! I must use it to make a few cards to sell, to get value from it.  Soft Suede and Pool Party inks were used, and the Owl punch was made to use the owl, with Spice Cake papers being used for his chest.  The sentiment is from Happiest Birthday Wishes.  Linen thread was tied around the end of the card for an extra feature.


Papers / Card Stock - Soft Suede, Very Vanilla, Pool Party, Spice Cake
Stamp Sets - Borderlines, Happiest Birthday Wishes
Embellishments - Linen Thread
Tools - Stamp-a-ma-jig, Owl Punch
Inks / Markers - Soft Suede, Pool Party


Thursday 24 May 2012

Happy Birthday Mum

Morning,

Happy Birthday Mum! I hope you're reading this, and like your card. 

My Mum has been eyeing up every card I've posted on my blog for the last couple of months! I keep telling her she'll have one that won't have been seen before, else it won't be a surprise!

You might recognise these cards, I've done a couple of versions of it before.  I made it at a Stamp-a-stack class that I attended, then made baby cards using the same design.  It was one that I have used at two card classes, in Leeds and Bradford. 

Both cards used various strips of paper from the subtles paper stack.  The were cut into 3cm lengths, and cut into the flag shapes.  The letters were stamped using the Just Perfect Alphabet stamp set, ad punched with the 3/4" Circle Punch.  The Square Lattice embossing folder was used to partially emboss the bottom section of the card.  Curly Cute was used the stamp the Happy Birthday sentiment, in the first card using the Rose Red marker to only colour half the sentiment, and in the second card, the ink pad was used to colour the whole stamp.


Papers / Card Stock - Subtles Paper Stack, Whisper White, Crumb Cake
Stamp Sets - Just Perfect Alphabet, Create A Cupcake, Curly Cute
Embellishments - Linen Thread
Tools - Big Shot, Square Lattice Embossing Folder
Inks / Markers - Rose Red, Pretty in Pink, So Saffron, Marina Mist, Certainly Celery

Wednesday 23 May 2012

Jubilee Cards

Evening,

I know I have posted today already, but I wanted to share with you the cards that I made with my card class last night.  I didn't have too many signed up for the class this time, but carried on regardless.  I hold the class at Dock Street Market in Leeds, and for anyone that's not been it's a really nice bar/cafe/deli/bakery/meeting place.  It's great for social groups to meet, last night there was Yarnia, a knitting group, Maths Jam, a maths and puzzles group, Meeples, a board games group, and my Stampin' Up! card class.  Lots of people stopped by the table to see what we were doing, and everyone loved the cards.  I knew a few friends were there at the various clubs, and I offered a drop in "pay as you go" style, so if anyone just wanted to make one card, they could do that.  A few further opportunities may have come out of last night for me, so watch this space while I arrange exciting things!


I'll be doing detailed posts about each of the cards below, over the weekend, so keep an eye out if you want to learn more about them and see a few more pictures.


Growing Green Stamp-a-stack card

Hello

I'm still getting through these Stamp-a-stack cards, I'm hoping I'll be done by the end of the week as I'm going to another Stamp-a-stack class on Friday.

Today's card is made with the Growing Green stamp set, and uses the colour combo of Pool Party, Regal Rose and Certainly Celery.  The flowers and leaves were stamped onto Whisper White and then coloured using the blender pens with the ink pads. The images were then cut out.  The flower was also stamped onto the Regal Rose card stock for a background.  The sentiment is from the Trendy Trees stamp set, and has been punched out with the Word Window Punch.


Papers / Card Stock - Pool Party, Regal Rose, Whisper White
Stamp Sets - Growing Green, Trendy Trees
Embellishments - Certainly Celery Satin Ribbon
Tools - Word Window Punch, Blender Pen
Inks / Markers - Pool Party, Regal Rose, Certainly Celery, Basic Gray

Tuesday 22 May 2012

Fox & Friends Stamp-a-stack card

Here's the second of the cards from the last Stamp-a-stack class.  It uses the Fox & Friends stamp set, a great  set for children's cards. The card used was Tempting Turquoise and Real Red with Whisper White, and a strip of Old Olive.  The Ink used were Tempting Turquoise for the whales, Early Espresso for the monkeys, Old Olive for the turtles and Daffodil Delight for the giraffes.  The Crimper was used to make the crimped effect on the strip of Old Olive, a simple way of adding a little more detail to your cards and projects. The Happy Birthday Wishes greeting is from the Petite Pairs stamp set.


Papers / Card Stock - Real Red, Tempting Turquoise, Whisper White, Old Olive, Daffodil Delight
Stamp Sets - Fox & Friends, Petite Pairs
Embellishments -
Tools - Large Scallop Circle Punch (retired), 1-3/4" Circle Punch, Crimper
Inks / Markers - Old Olive, Tempting Turquoise, Early Espresso, Daffodil Delight, Real Red

Monday 21 May 2012

Regional Training - Summer Mini Catalogue card front

This is another post about the Regional Training I attended in Leeds on Saturday.  We were asked to bring a card front, or a mini scrapbook page, using products from the new Summer Mini Catalogue.  As I've got a card class on Tuesday evening, I decided to make a card that I could use in the class too.  The class is based on a Diamond Jubilee theme, using all things royal and British.  I thought the new Tea Shoppe Stamp set would be ideal.

I stamped the tea cups in Riding Hood Red and Not Quite Navy ink onto Whisper White card stock.  This was mounted onto Riding Hood Red card stock, and then I used the Paper Piercing Tool to create a dotted border around the edge.  The tool comes with a clever see through mat, so you can line up around the edges of your card and make holes in a straight line.  I then stamped the Stay sentiment onto a strip of Whisper White card stock, and mounted it onto a strip of Not Quite Navy card stock that had the edge punched with the Scallop Border Edge Punch.  I added a strip cut from the Lace Ribbon Border punch in Riding Hood Red.  To finish it off, I stamped the flower from the Tea Shoppe set, and then used the Scallop Oval Punch for a border.


I hope my card is liked at the Regional training day, and that my class attendees enjoy making it too.  It's a perfect card for where I hold my classes, at Dock Street Market, as they serve cocktails in tea pots and china cups!


  I think I need to put the kettle on now, who doesn't love a nice cuppa! Tea anyone??


Sunday 20 May 2012

Regional Training - Name Badge

Another one of the requirements to attend the Regional Training in Leeds on Saturday was to make our own name badges to bring with us.  I had too many ideas for this, and after much deliberation, this is the design I came up with.  I used the Labels Collection Framelit Dies, and cut out the largest in Pool Party and the next size down in Whisper White, which was also embossed with the Perfect Polka Dots embossing folder.  I used the Pennant Parade stamp set and the Petite Pennants builder punch with the new In Colours to make the bunting flags.  The Just Perfect Alphabet was used to stamp the letters in Basic Gray, and cut with the 3/4" Circle punch.  Finally, the Beautiful Wings Embosslit die was used to cut the butterflies in Pool Party. 


Saturday 19 May 2012

Regional Training - Swaps

Today, I'm attending a Stampin' Up! regional training day in Leeds.  I've never been to one of these events before, so I'm really looking forward to it. There was a number of things we had to make to bring with us, and I'll be sharing these over the next few days.

As with many of the training days, we had to bring along swaps.  It's a great way to meet and chat with other demonstrators, and share ideas and techniques.  For today, I made 50 swaps, this is the most I've ever made before.  I didn't start off too well, when I went to Kylie's (my downline) last week, I realised I'd left all my card stock at home.  It turned out ok though, and after some discussions over what I could do without it, we came up with making these pillow boxes, using the Pillow Box die with the Big Shot.  I used the Twitterpated and the Beau Chateau papers, and the Apothecary Art stamp set, with the new Labels Collection Framelits dies.  To finish them off, I added the Stampin' Glitter Dazzling Diamonds and some Linen Thread tied around the box.  It was obvious I'd been using the glitter, it was everywhere, all over my face, jumper, and all over Kylie's house! In the photos below, not all of the boxes have Linen Thread tied around them, I ran out and had to order some more at the last minute.  Lesson learnt, make sure I check my supplies first!


For the Twitterpated papers, the colours used for the Apothecary Art label were Pear Pizzazz, Riding Hood Red, Island Indigo, Blushing Bride and Baja Breeze.


For the Beau Chateau papers, I used Soft Suede, Marina Mist and Pink Pirouette for the labels.


Papers / Card Stock - Twitterpated, Beau Chateau, Whisper White, Very Vanilla
Stamp Set - Apothecary Art
Embellishments - Dazzling Diamonds, Linen Thread
Tools - Big Shot, Pillow Box Die, Labels Collection Framelits Die, Paper Piercing Tool
Inks / Markers - Riding Hood Red, Baja Breeze, Pear Pizzazz, Island Indigo, Blushing Bride, Soft Suede, Pink Pirouette, Marina Mist

Friday 18 May 2012

Little Princess Stamp-a-stack card

I attended a Stamp-a-stack class a few weeks ago, and only getting round to posting these now.  I've got another one in a weeks time, I'll have only just finished posting the last lot and I'll have six more to write up!
 
This card uses the Little Princess stamp set, and the colours are Peach Parfait, and Pretty in Pink.  The princess was stamped with Basic Gray onto Whisper White card stock, and her hair was coloured with a So Saffron marker.  The Decorative Label punch was used to cut her out, and then used to make an extended border around her in the Peach Parfait card stock.  The new Adorning Accents Textured Impressions Embossing Folders were used to make the hearts embossed panel at the bottom of the card.  These are thin embossing folders, which can be positioned anywhere on the card.  The Large Oval Punch was used to punch out the Princess sentiment, and then mounted onto the Scallop Oval Punch for a border.  The Itty Bitty Shapes Flower Punch was used to punch out the flowers on the sentiment.  I like this card and stamp set, perfect for all the little princesses in your life!


Papers / Card Stock - Peach Parfait, Pretty in Pink, Whisper White, 2010-20112 In Colour Patterns Designer Series Paper Stack,
Stamp Sets - Little Princess
Embellishments - Rhinestone Jewels, Pretty in Pink Scallop Dots Ribbon
Tools - Big Shot, Adorning Accents Textured Impressions Embossing Folders, Decorative Label Punch, Itty Bitty Shapes Punch, Scallop Oval Punch, Large Oval Punch
Inks / Markers - Basic Gray, Pretty in Pink, So Saffron, Peach Parfait

Thursday 17 May 2012

Greenhouse Garden

Today I'm sharing another card that I made at the recent card class in Bradford.  My former upline, Gemma, was selling some of her Stampin' Up! stock, as she's no longer a demonstrator, and doesn't find much time to craft.  So I jumped at the chance to buy her goodies, and Greenhouse Garden was one of the sets I'd had my eye on and she was selling.  It's a Two Step Stampin' set, which means there are stamps in the set that are meant to be layered, or each stamp should be used in conjunction with the other stamps in the set.  The Stamp-a-ma-jig is definitely needed for these sets, and for anyone that's not used one before, it's a tool to help line up stamps so they are perfectly straight, or for set like Greenhouse Garden that layer on top of each other.

For this card, I used Crumb Cake and Pool Party card stock, with papers from the First Edition Speciality papers, cut using the Top Note Die.  I'd seen a few cards on line where images had been stamped onto this set, and was keen to try it myself.  The flowers were stamped with Pool Party, and Island Indigo for the centre of the flowers.  The stalks were stamped in Lucky Limeade.  I used the Colour Spritzer Tool to make the splatters of ink effect, a tool which I don't use enough.  I had one of these as a child, and was pleased to try it out again. The sentiment is from Curly Cute.  The card I brought along to the class to use as the example had the sentiment stamped onto the First Edition papers, but when I was demonstrating the card to the class, I decided to alter it so the Top Note layer was slightly to the right, and stamped the sentiment onto the Pool Party. 

As with most of my cards, I'm looking forward to trying this card again, in different colours and layouts.  Does anyone who has this stamp set have good colour combinations for the flowers I should try?


Papers / Card Stock - Crumb Cake, Pool Party, First Edition Speciality Papers
Stamp Sets - Greenhouse Garden, Curly Cute
Embellishments -
Tools - Colour Spritzer Tool, Big Shot, Top Note Die, Stamp-a-ma-jig
Inks / Markers - Pool Party, Island Indigo

Wednesday 16 May 2012

Aviary class card

Here's another card from the first Dock Street Market card class.  I'd seen one very similar on line, and loved the layout, using the Aviary stamp set.  I used Marina Mist and Very Vanilla card stock, with Island Indigo and Crumb Cake ink.  The Top Note die was used to cut out the Very Vanilla card stock.  The hello stamp is from Pennant Parade.

It was really good at the class to see how everyone made this card in different ways.  Some people were happy to copy it, exactly, detail for detail.  Others however, wanted to bespoke it, and were unhappy the birds were caged, and wanted to free them!  That's one thing I love about classes, some people want to be led, and others, want to break free!


Card Stock / Papers - Marina Mist, Very Vanilla
Stamp Sets - Aviary, Pennant Parade
Embellishments - Very Vanilla Satin Ribbon, Mini Brads
Tools - Stamp-a-ma-jig, Big Shot, Top Note Die, Paper Piercing Tool
Inks / Markers - Island Indigo, Crumb Cake

Tuesday 15 May 2012

Card Class - Bunting

A few weeks ago, I held a bunting themed card class at Dock Street Market, Leeds.  We made four cards, all with a bunting and flags theme.  It was a fun class, and with the Queens Diamond Jubilee coming up, I thought it would be a good theme for all those summer cards.

Here's one of the cards we made that evening.  I'd seen a similar card on Pinterest, and liked it so much.  (As I'm writing this post, I've noticed that the card in the photo doesn't have the clouds that were made from the Cupcake punch, I'll take a photo of the finished card and add it later - oops.)  I like how the Bashful Blue and the Certainly Celery card looks like sky and grass.  The papers used for the bunting flags are from the Nursery Nest, which I got free last month for placing a £45 order.  The Pennant Parade stamp was stamped in Basic Gray ink onto the papers and then punched with the Petite Pennants Builder punch.  Bows were tied with Linen Thread, and attached the the edges with the mini glue dots.  The sentiment was stamped with Rose Red ink, from the Sincere Salutations stamp set.


Papers / Card Stock - Crumb cake, Bashful Blue, Certainly Celery, Nursery Nest
Stamp Sets - Pennant Parade, Sincere Salutations
Embellishments - Linen Thread
Tools - Petite Pennants Builder Punch, Cupcake Builder Punch, Eyelet Border Punch
Inks / Markers - Basic Gray, Rose Red

Sunday 13 May 2012

Party This Way balloon card

Morning,

Todays post is just a quick one.  I'm trying to catch up with the backlog of posts from the last few weeks.  This is a card that I used for the card class I held in Bradford a few weeks ago,and was based on a layout of one of the cards I made at a Stamp-a-stack class.  The colour combo is Calypso Coral, Wisteria Wonder and Lucky Limeade, and the balloons are from the Party This Way stamp set.  Linen Thread was used for the strings of the balloons.  A cute and easy design and layout, I'll be using this one again soon.


Thursday 10 May 2012

Clearly For You card

Hello,

As you can tell, I'm getting back into the swing of things with this blogging, and enjoying writing and sharing again.  Maybe I'll have to schedule in craft free weeks now and again so I can have a rest from it! I absolutely love it though (can you tell) but sometimes my brain gets a bit overloaded with ideas and plans etc etc that it gets a bit much.  Any of you other crafters out there ever feel like that?

Today I'm sharing a card with you that uses the Clearly For You stamp set.  I loved this set when it first came out, and my friend/customer (now downline) Kylie bought it, and I've had my eye on using it for a while.  We joked the other day about how we needed to live closer to each other to share each others craft stash, and when we're retired widows, we're going to share a granny flat with a Stampin' Up! craft room in the middle. Sounds great! Hahah!

This card is for a friend of mine, and I wanted to make something a little vintagey, and classy.  I used Always Artichoke, Very Vanilla and Crumb Cake for this card. I used the 1-1/4" (3.2cm) Square Punch to cut out the tiles, some of which were stamped first, and others stamped after.  That's one of the great things about using punches and stamps, you can line the punch up over the image to make sure it's lined up correctly, or cutting the exact area that is wanted.  I love all the stamps in the set, the birds, the butterflies and the ladybirds, it's hard to say which is my favourite.  I used the Sponge Daubers around the edge of the tiles with the Always Artichoke ink, to soften the edges.  Using one of the techniques I learnt at the recent Beautiful Bows class, I made a bow with the Very Vanilla satin ribbon, held together with a Antique Brad to the bottom of the card, adding an extra bit of glamour. 


I love this card, and I'll be recreating it again soon, and the beauty of it is that it can be done with many different stamp sets.  Watch this space!

Wednesday 9 May 2012

All Day Training Swaps


A couple of weeks ago, I attended an all day training session, with 30 other Stampin' Up! demonstrators.  It was based around the new Summer Mini Catalogue, and it was the first time I'd seen a lot of the products from the new range.  As a demonstrator, we get access to view the catalogue before it is available to customers, and we can order products early.  It's exciting knowing customers are waiting to get their hands on the catalogue and products, when we get our "sneak peak".  In the morning, we learnt lots of tips and ideas for running classes, and in the afternoon we got hands on and crafty! I'll be sharing the cards and things we made (when I've finished them!).

One of the great things about the day is that we do swaps, we each make an item, a card, or a 3d projects to share with each other.  It gives everyone a chance to have items made from products and stamp sets we might not own ourselves yet, and it really makes a difference to customers than just looking in the catalogue.

 
For my swaps, I used the Tea Shoppe stamp set, and the Twitterpated designer paper series.  Using the Top Note die, I made a tea bag gift holder. You can see in the picture below how the tea bag sits inside, attached with a sticky dot. The inside was stamped with the three small tea cups in Whisper White, and the large tea cup was stamped onto Whisper White card stock using Pear Pizzazz, Baja Breeze, Blushing Bride and Island Indigo inks.  The Just For You and A Cup Of Thanks sentiments were stamped onto the four colours, with the same colour ink, and then punched out with the Modern Label punch. The Top Note die was used to cut out the Twitterpated papers, which was trimmed around the edge, to give a border with the card underneath.  Finally, Pear Pizzazz and Baja Breeze seam binding ribbon was used to tie a small bow at the sides.  Of course, one of the cats had to get involved and help, I wonder if it was the smell of the mint tea that did it!


Tea bag inside the holder
The inside, stamped with Whisper White ink

The pile of swaps

The swaps, boxed and ready to go

Blushing Bride tea cup

Pear Pizzazz tea cup
Island Indigo tea cup

Rusty providing assistance!

I hope you like these new products, I can't wait to share some more things with you.