Monday, 16 January 2012

Owl Punch & Petite Pennants Punch Magnets

How cute it this!?  I was browsing in my local craft shop recently, and spotted some magnetic photo paper.  I decided to buy some to have a play with.  I knew it could be die cut with the Big Shot, and I was really pleased when I found it was just thin enough to be punched.  I looked at all the punches I have, and of course the Owl Punch just jumped out at me! I punched the magnetic sheet, and then punched the owl shapes in card/paper and then stuck them together.

Once I had tried it with the Owl Punch, I wanted to make more! I thought the Petite Pennants Builder Punch would be good too, and I think it turned out well.  I used the Just Perfect Alphabet Stamp Set to do the letters and the Pennant Parade Stamp Set for the flags. 

I'm looking forward to trying this with more dies and punches, I think it would look great with some of the flower dies, Fun Flowers, or the Blossom Party from the new Spring Mini Catalogue. 

Wednesday, 11 January 2012

Team Training

A few weeks ago, I attended a team training session at Julie Kettlewell's house.  We got to see a few sneak previews of items from the Mini Catalogue that had arrived already on the pre-orders, and this is the card and gift we made, using the My Friend set.  That's one of the benefits of being a hostess, we get to see and order the products to play with before they are released in the catalogues.

Both the cards and the gift bag used the colour combination of Lucky Limeade and Concord Crush. The butterflies were cut with the Beautiful Wings Embosslits Die.  The little flowers were punched with the Itty Bitty Shapes Punch.  We made two cards, same design, but with one showing what a difference a few extras make to it, by adding the rhinestones jewels and the Scallop Dots Ribbon, it does make it look that bit more special I think.

The gift bag was made with two Scallop Circles using the Bigz die, and contains a cello bag inside which could be used for sweets or other small gifts.


Card Stock - Lucky Limeade, Concord Crush, Whisper White
Papers -
Stamp Set - My Friend
Embellishments - Rhinestone Brads, Scallop Dot Ribbon, Ruffled Ribbon
Tools - Big Shot, Crop-A-Dile, Decorative Label Punch, Itty Bitty Shapes Punch
Inks/Markers - Lucky Limeade, Concord Crush


Monday, 9 January 2012

Pay It Forward

Hello

Inspired by a blog post by a fellow crafter, Lisa (http://lisasew.co.uk/2011/12/new-year-new-blog-new-name/) I have signed up to take part in Pay It Forward.  The rules are -

"Pay it forward 2012: I promise to send something handmade to the first 5 people who leave a comment here. They in turn must post this and send something they make to the first 5 people who comment on their status. The rules are that it must be handmade by you and it must be sent to your 5 people sometime in 2012."

If any of you reading would like to receive some handmade Stampin' Up! goodies, please leave me a comment or email me and tell me a bit about yourself.  You don't need to have a blog yourself to take part, you could post on Facebook or Twitter.

Sunday, 8 January 2012

Aviary Candle

Last Saturday, I tried a new technique that I've been meaning to try for a few years. Inspired by my friend Kylie (and soon to join my team as a demonstrator!) who had tried this out at Christmas, I wanted to try decorating a candle with stamped images. It was really easy, and just look how it's turned out. I used the Aviary Stamp Set, and used Basic Grey ink for the cages, and Baja Breeze for the owls. The images were stamped into tissue paper, and then using a heat gun, applied them to the candle. I added a Rhinestone jewel for a bit of bling. I can't wait to experiment with this using different sized candles, colours and stamp sets.

If you'd like to learn how to do this, please contact me to book a class.

Saturday, 7 January 2012

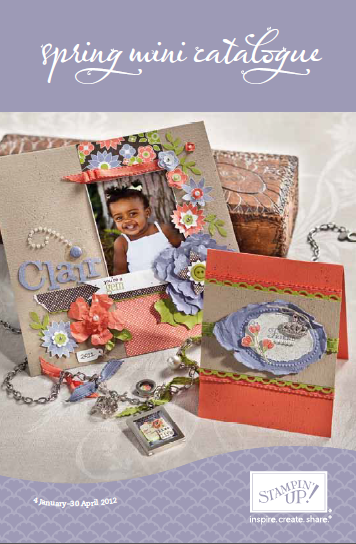
The Spring Mini Catalogue has arrived

Hello!

Here's something to brighten up your New Year, with the bad weather we've had this week, we all need something to look forward to at this time of the year.  The new Spring Mini Catalogue has arrived!

If you'd like a copy of the mini catalogue posted to your home, please let me know. It's only £1.00 including postage, or check it out online by clicking on the image below or on the right hand side of this page.

Click Here to view the catalogue online

It's full of new products, papers, fabric, stamp sets, punches, and loads more.  I was lucky enough to receive the Charming stamp set, and the Create a Cupcake set for free after the recent Worldwide Week of Workshops Bookathon, and as an early Christmas present to myself I treated myself to the Cupcake builder punch.  There's a new product line called Simply Adorned, with co-ordinating stamp sets, baubles, and chains to make jewellery and charms.

Simply Adorned

Create A Cupcake Stamp Set and Builder Punch

Please contact me if you'd like to have a workshop to get your hands on these new products - they are available for a limited amount of time only, between the 4th January to 30th April.

New Year's Resolution & Christmas Catch Up

Happy New Year!

I hope you all had a lovely Christmas and a Happy New Year, and that Santa brought you lots of crafty goodies.  I received a few sewing books that I've had my eye on for a while, and my friend Kylie let me choose a Stampin' Up! set of my choice - so I picked Aviary, I can't wait to get started playing with it.  With my last order, I also received the Charming and the Create a Cupcake stamp sets from the new Spring Mini Catalogue (blog post to follow) for free, as well as a set of the Brights Brads, as a reward for getting two workshops booked during the recent Worldwide Week of Workshops Bookathon.  13,887 workshops were booked across the world that day! How good is that! It's not too late to book a workshop, so if you are interested, please contact me.  Or if you are interested in becoming a demonstrator, to receive great benefits like has just been offered, let me know.


Charming & Create A Cupcake stamp sets and Brights Brads


Aviary Stamp Set


I've not been very good at keeping myblog updated recently! Christmas took over, and I was so busy making all my cards and a few gifts, many at the last minute, that I forgot to take pictures of all my creations! I also didn't want to spoil any surprises by posting pictures on here before I sent cards.  I managed to sell quite a few cards at work this year, which was very exciting, two colleagues saw samples I had brought in and asked for 6 each.  Another friend wanted a 21st birthday card, and ended up buying 3 others too.  It got me motivated to try to do more this year, and have confidence that people do like and want to buy my creations.  My New Year's Resolution is most definitely to do more blog posts, and generally, do more crafting! Or at least be more organised with it! I've noticed a lot of crafty plans being made through Twitter recently, and I'm looking forward to making a few more friends through the various groups that are popping up around Leeds.

The first step to this organisation, will be getting my craft room in some sort of order! Even though I have a room where I can keep everything, I still end up bringing it all downstairs to the lounge and spreading out there in front of the TV.  After I had finished my cards, I then took it all back upstairs, and just put it on the floor, so I can barely get in and around the room now. It all needs taking out, sorting through, and putting back in so I know where everything is.  I also need a clear out, and I need to be brutal! So keep an eye out, there may be some sales and bargains available soon.

On a down note, my New Year didn't start off too well, by dropping my iPhone! So just incase any of you are trying to place orders or get hold of me or through Facebook, Twitter, email or good old phone calls, please be patient! It still works but is pretty difficult to see, as you can see from the picture below.  The "A" key on my laptop is playing up too, so please excuse any funny spellings! Why do these things all happen at once eh!

Friday, 18 November 2011

Christmas Owl Cards

Hello,

What a lovely evening I had on Wednesday demonstrating at a Stampin' Up! workshop at my friend Ama's house.  There were three ladies who are already customers, and two who had not been to one of my workshops before, but have heard me on numerous occasions raving about the products at craft club and had seen my creations at the Craft Garden for Light Night.  One of the best bits of being a demonstrator is being able to share my excitement and enthusiasm about all of the products, and seeing other people excited too is amazing (and slightly reassuring it's not just me that wants everything in the catalogue!)  Ama made us all tasty cupcakes and chocolate cake so we were all stuffed by the end of the evening.  I meant to take a picture of them to share, but we started eating them too quickly!

Here's a picture of me in action!


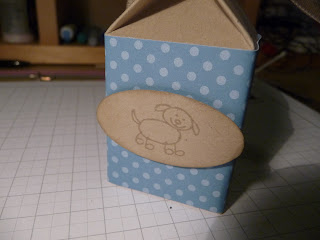
As a thank you to Ama for inviting us all over for an evening of crafty fun, I thought I'd try out my new Mini Milk Carton die, which I bought with some birthday money. Seeing as Ama would be having all the fun, I decided to make a present for her little doggie Ozzie.  I covered the Crumb Cake milk carton with a strip of Designer Paper, and then stamped a dog from the All My Family stamp set (which was sneakily bought from my Stampin' Up! mummy Gemma by my friends as another birthday gift!) onto Crumb Cake and punched it out using the large Oval punch.  I filled the carton with doggie treats, and then used a clip from the Clips Assortment set and finished it off with a bit of Crumb Cake Seam Binding Ribbon.  As you can see on this picture, Ozzie sniffed out that there was a present for him in the box, and he nearly gave the game away as I wanted to wait until everyone was there before giving the gift to the Ama.


Here's the mini milk carton - isn't it cute!


Below are some of the cards we made for the Make and Take, the guests loved it and had a great time making it.  I was really pleased with their cards as they moved things around so they were different to mine.  I'll certainly be using their designs for this card again. The cardstock is Cherry Cobbler, with Crumb Cake cut with the Top Note die.  This was then stamped with Chocolate Chip ink using the Woodgrain background stamp.  I was so pleased when this came into the new catalogue, it's perfect for using with the Owl punch and so much more. The border is Cherry Cobbler from the Regals Collection Designer Paper Stack, with a strip of Old Olive punched with the Scallop Border punch.  The owl itself was punched using Cherry Cobbler, Whisper White, and Crumb Cake, with a leaf cut from Old Olive using the Bird Builder Punch.  The sentiment is from Contempo Christmas stamp set, in Chocolate Chip ink.  The belt of the owl is Basic Black 1/8" (3.2mm) Taffeta Ribbon, finished with a Rhinestone Jewel.


Here's a few other Christmas Owl cards I made, when I was deciding what to do for the Make and Take project. The first is a simpler version of the one above, with Old Olive cardstock. The second one uses the Vintage Wallpaper embossing folder instead of the wood stamp, and has been inked using the sponge daubers on the raised areas.  Curly Cute has been used on these cards for the sentiment.


If you'd like to make any of these items, and would like to host your own Stampin' Up! workshop from the comfort of your own home, please contact me.