Wednesday, 17 September 2014

Project Life - Hen Do Title Page

Good morning,

I hope you're all having a good morning so far.  I have a busy day ahead at work, but I'm looking forward to some more crafting this evening.

I have been doing some Project Life this week.  I did a couple of pages at a team training event a few months ago, and loved it straight away.  I didn't go into to much detail with it, and I just slipped a few holiday photos in the pockets, and some of the journalling cards.  I was hooked straight away, so bought a few more bits and pieces.  I ordered lots of photos, and sat down one Sunday evening while I had the house to myself and started working on photos from my friend Tamsin's hen do in 2011.  I did the same with these photos, organised them, put them in the pockets, and decided where I was going to embellish the pages with extra detail by stamping or using the stickers from the accessory pack.  I really enjoyed that nothing was fixed, or stuck down, and I could move things around as many times as I wanted until I was happy with the layout. I realised there were a few gaps, so I ordered a few more photos.  This is how is stayed for weeks!

I've had some more free time this week, and after two evenings of tidying my craft room last week, it feels like a luxury to be able to come up to the attic room which is actually usable!  I know where everything is, and there's space on the floor, and on the desk! I hope it stays that way.  I've done more up here in the last two weeks than for months!  I decided to get out my Project Life folder, and do some crafting.


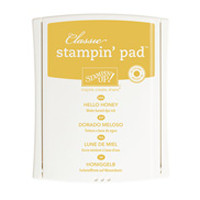
I used the Skinny Mini Alphabet stamp set, which comes in the new stamp style called photopolymer.  They are clear, see through stamps which cling to the clear blocks.  This is great for placing letters close together, and there's no need to use the stamp-a-ma-jig.  I used the colours from the Happiness Is Card Collection, Lost Lagoon, Tangelo Twist, and Hello Honey.  The apostrophe is from the Back To Basics Alphabet stamp set, also in photopolymer.  


The Hen Do letters are from the Happiness Is Accessory Pack, which co-ordinates with the card collections.  I stuck these on the outside of the photo pockets.  


The last card was stamped using the Project Life Day to Day stamp set, which contains dates and days and numbers for years, and then used the Back to Basics Alphabet stamp set for stamping Wales.


As you can probably tell from the photos, the hen do theme was 'glamping' and we stayed in yurts.  I won't tell too much about what else we did that weekend, as I'll be sharing more photos as I finish the pages.  Here's one photo / card that I will share though, so you can see what fun Tamsin had from the minute she arrived!  I've used the washi tape (or squashy tape as a little friend of mine called it at the weekend!) to attach the photo to the card, so it creates a flap underneath, where there's some details about the photo.  I need to stamp or write on the front "Lift Me" so I remember the notes are underneath.  I used My Digital Studio (MDS) to create the writing, and once I get the hang of it, I'll do a tutorial.  I had a few mishaps with printing things upside down, but it will just take practice. That's what the hearts are for, to cover up a little mistake! No one will know!


Have a great day, and if you want to find out more about Project Life, please let me know.  I'm starting a Project Life monthly club in October, and if you want to find out more, please head across to my Events Page on Facebook for more details.


Tuesday, 16 September 2014

Clearance Rack

You might not be aware of this, but Stampin' Up! have a clearance rack, which is updated with new products all the time.  The products have up 80% off, and there's some great items in there at the moment.

If you're into crafting for Halloween, or want to do some Christmas Journalling, check out these items.

Please check back regularly, and if there's any items I think might be of interest, I'll share them on here.

Monday, 15 September 2014

Weekly Deals


Here's a screen shot of this week's Weekly Deals.  Check out those bargains!

To purchase any of these items, follow this link to my online shop


Wednesday, 3 September 2014

Good Greetings Promotion

Good evening,

I hope you are all well.  I'm just letting you know about a new promotion that Stampin' Up! are offering until the 31st October 2014.

If you hold a Stampin' Up! party, and achieve sales of £200, you will receive a free stamp set called Good Greetings, which contains 19 sentiment stamps for all occasions.

If you don't fancy hosting a party, and you just have a really big wish list, and fancy treating yourself, you can earn this stamp set too! Go on, treat yourself!


Click here to go to my online shop

Thursday, 21 August 2014

Greetings from Denman College

Good morning!

I have woken up early, with little sound except the birds singing. Living in a terraced house in Leeds, I'm more used to traffic and sirens from the fire station at the top of the road! I'm currently at Denman College in Marcham, Oxfordshire, the Women's Institute venue which hosts a huge range of cookery, craft, and lifestyle classes. I was lucky enough to win £200 worth of vouchers a few years ago from my WI Buns & Roses in Leeds City Centre, and I found a course on Free Machine Embroidery that I'd always fancied trying, but never plucked up the courage to try at home! I booked myself and my friend Kylie Henshaw on the course as a nice treat! 

We arrived yesterday at 12:00 and we shown to a room where we could drink tea, and was stocked full of craft magazines. Perfect! We then went for lunch, which we chose Paprika Chicken, potato wedges and roast vegetables. It was lovely! We realised at lunch that we were the youngest two at Denman, but all the older ladies made us feel very welcome, and were thrilled we were there, and loved hearing about what Buns & Roses was like. We then had a wander around, and then went to our welcome talk, and met our tutor Claire Muir.

Off we went to the textiles block, and found our spots. Claire explained what we would be doing, and we all marvelled at her samples, thinking we'd never be able to make our work like hers! Here's my sewing machine, in the bright sunshine all ready to go.

The difference with free machine stitching is that the feed dogs or teeth are dropped, or on some machines they come with a little plate that sits on top of them. A special foot also has to be used.


After a quick demonstration, Claire made sure all our machines were ready and then off we went. It felt very strange at first, being able to sew in all different directions, and my first attempts were a bit clunky!


We kept practicing for a while, and it was great to see what the other 11 ladies on the course were producing with their machines.

We then had coffee and of course cake! We were realising that food was a big part of the stay at Denman! At the welcome talk, we'd also been informed that the bar would be open before dinner, and that all the profits from the bar went straight into the carpet cleaning! Sounds like a perfect excuse for a tipple or two.

We then were given a piece of fabric with a stamped image of a butterfly, to decorate as we wished. This is what I came up with. 


It was great fun, and everyone in the room ended up with unique designs. 

I cannot wait to get home to see what Stampin' Up! stamps I can use on material to stitch over!

Next we tried adding some texture using Merino tops wool. This was quite tricky but I think I mastered it! I'll be raiding my sisters felting box when I get home!


We then stopped for drinks and dinner, which was lovely. I sat on a table of 8 and everyone chatted away about their WI's and where they were from and we heard about their previous visits to Denman. I had come with a friend, but I felt very sure that if I'd come by myself, I'd have made friends very quickly.

After dinner, we had another hour or so on the machines, and we did a bit or ironing! We chopped up small pieces of silk onto our material, and then stitched over the top.


Claire practically had to throw us out of the room at 21:30, I'm sure we could have kept on going for hours! We headed back to the bar, chatted and got to know each other a bit more, and then headed to our rooms.

Right, it's nearly time for me to get up, shower and then head to breakfast (more food!) I'll take some more pictures today, and will be back with another blog post about my stay soon.

If you don't already "Like" my Stampin' Up! page on Facebook, head over to http://www.facebook.com/mycardsandcrafts as I'll be posting pictures throughout the day on there.


Saturday, 29 March 2014

Hip Hip Hooray Card Class - Saturday 3rd May 2014

Hip Hip Hooray Card Class 


Saturday 3rd May 2014, 14:30-16:30
Beeston Parish Centre, Town Street, Beeston, Leeds, LS11 8PN

At this class you will create 20 cards for a variety of occasions using the Hip Hip Hooray kit from Stampin' Up!, which contains everything (minus scissors!) that you'll need.
The class costs just £25 and you'll receive everything you need to make the cards, plus an ink pad and stamps that you'll be able to use again and again. 

The kit contains:
  • Card stock and envelopes for 20 cards
  • Twine, clips, and adhesive die cut embellishments
  • Three piece Hip Hip Hooray stamp set and clear stamp block
  • Stampin' Dimensionals
  • Basic Gray Stampin' Spot ink pad
  • Full colour instructional booklet
  • You'll also receive a full pack of Rhinestone Jewels which contains 150 sparkly adhesive jewels that will add bling to your cards.

No experience is necessary, and refreshments will be provided.

Please confirm your attendance by Saturday 26th April 2014.  You can confirm your attendance by signing up here

Thursday, 21 November 2013

Convention Team Swaps


Evening all!

Remember me? I used to write this blog! Life has been a bit busy recently, and I've not had much time to keep in touch on here.  I'm due to start a new job soon too, so that will take a bit of getting used to after working where I currently work for the last ten years. It's all exciting stuff though, I'll let you know how I'm getting on.

This evening, I'm in Manchester for the 2013 European Stampin' Up! Convention, and it's my first one ever! I've been a demo for about two and a half years now and I've not managed to go to convention yet.  I was a couple of places short of booking on last year, and left it too late and it was full.  Living in Leeds, I had no excuse not to be the first in the queue this year as it's just a train ride away. I can't wait to share some pictures with you, and tell you all about what I get up to.

There was a few things we had to make to bring with us.  Team swaps, general swaps and a gift for our room mate if we're sharing a room.  I'm sharing with my friend and downline Kylie.  Today I'll be sharing pictures of the team swaps I made.

It's always tricky deciding what the perfect swap will be, and it took me ages to decide what to do.  I decided to make candles, with a Christmas image from My Digital Studio (MDS).  This seemed like a great idea, and I made the first one.  It looked great.  Off I went to Ikea, to buy enough for the 32 ladies who have opted in to the team swaps.   I realised then, that my idea may not have been such a good one after all!  I bought the 32 I needed, as well as a few extra, and by the time I had lifted all 50 candles on to the till, I was bright red and wondered what all the people in the queue behind me thought I was doing with all these candles! The man right behind me congratulated me on my dedication to lifting them all.  Then I realised I had to transport them all to Manchester! Oh well, it was too late to change my mind.

I printed the image from MDS onto normal printer paper, to make sure I had the size right.  After a few adjustments, I was happy with my image, and I then printed the image onto tissue paper which had been taped onto a piece of card with masking tape.  I then cut out the image and used a tiny bit of glue on each corner to stick it lightly to the candle.


 I then wrapped a piece of tissue paper around the candle and gently heated the image using a heat gun.  The heat melts the candle just enough to melt the tissue paper into the wax giving a smooth finish.


 I love this technique and it can be done with any stamped image or printed image. I then wrapped the candle in cellophane and tied a small length of Linen Thread to secure the cellophane then tied a length of the lovely Cherry Cobbler 1" (2.5cm) Stitched Edge Grosgrain Ribbon around into a bow. 


I really hope my team like their gifts, and I can't wait to see what lovely things they have made.  It's been fun seeing everyone's updates on our Facebook page, seeing the hours they have spent crafting away, and the excitement building!

Here's a picture of the swaps altogether...see why I realised how heavy they were going to be! The next picture of the candles in the box is just over half of the full lot! My suitcase was very heavy, and one of the wheels broke as I got off the bus in Manchester, and had to drag it down the street to the hotel.  Thankfully I don't have to take them back with me to Leeds!